APNs Push configuration
SDK running status
-
When the App is visible in the foreground, the SDK is active in the foreground. The SDK is used persistent connection to receive messages at this time.
-
When the App enters the background and within 2 minutes, the SDK is active in the background. The SDK is used persistent connection to receive messages at this time. The user implements local notification depending on their requirements, otherwise there will be no local notification pop-up).
-
When the App enters the background for more than 2 minutes, it is suspended by the system. At this time, the SDK is in an inactive state, or the App process is actively killed. If there is a new message at this time, it is reminded through Apple‘s APNs service. When the App is launched again, the SDK will go to the server to fetch the messages during the inactive period.
Note:**Since local notifications are hard to distinguish from APNs, it is recommended that you should kill the App process when debugging to ensure that all notifications come from APNs pushes.
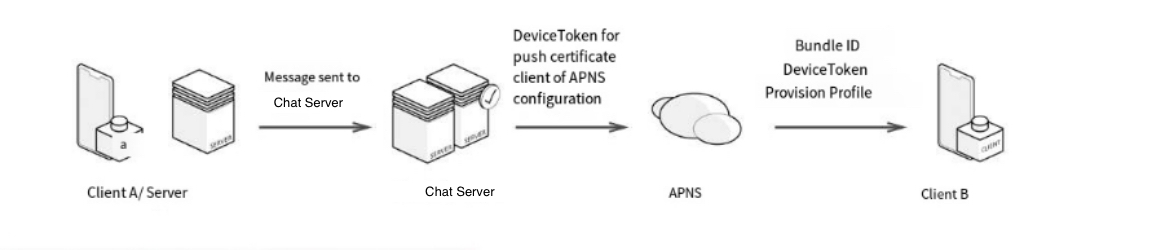
Message push process
When the SDK is in the foreground or background active state:
 {.align-center}
When the SDK is inactive or the App process is killed:
APNs only work as the notifications here. When the user launched the App, the message will be received by clients through the SDK persistent connection.
Configuration push
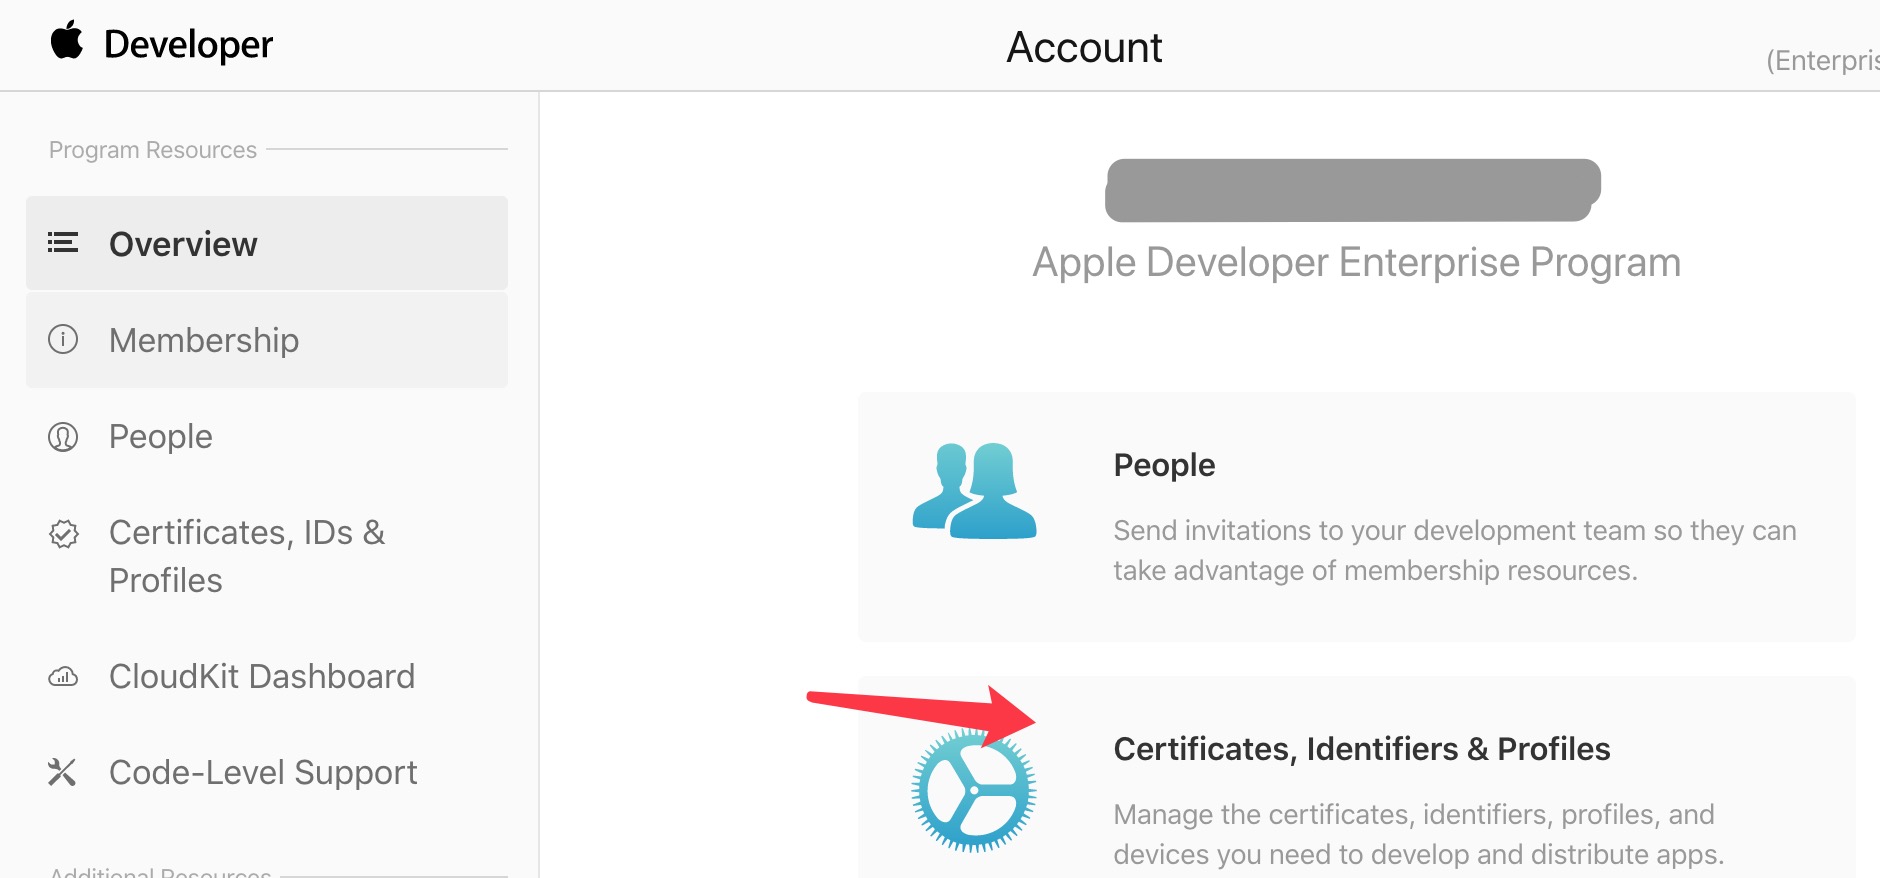
Apply for remote push certificate
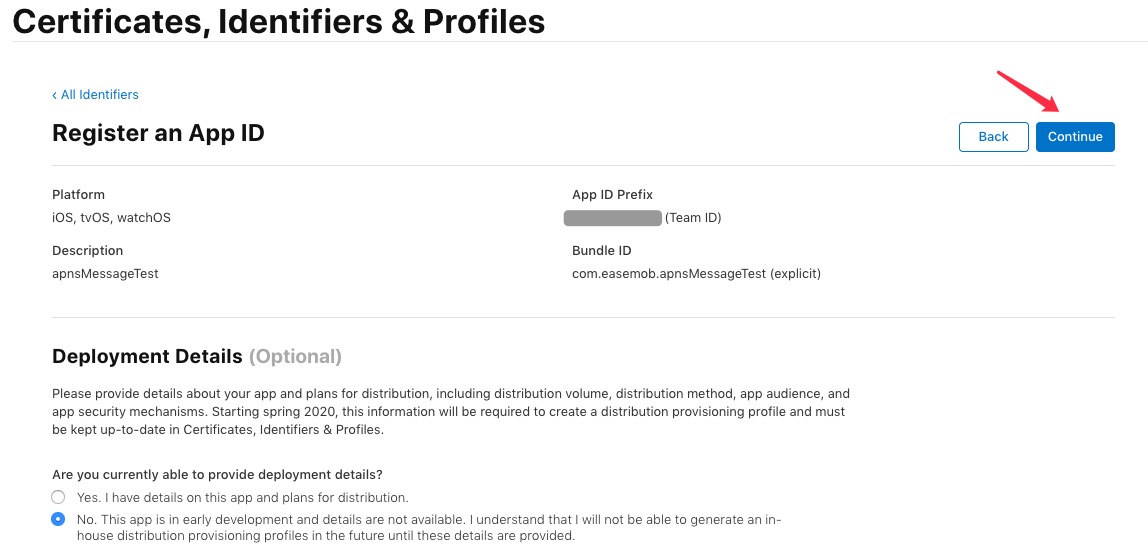
First, log in to Apple’s Developer Center. Create App
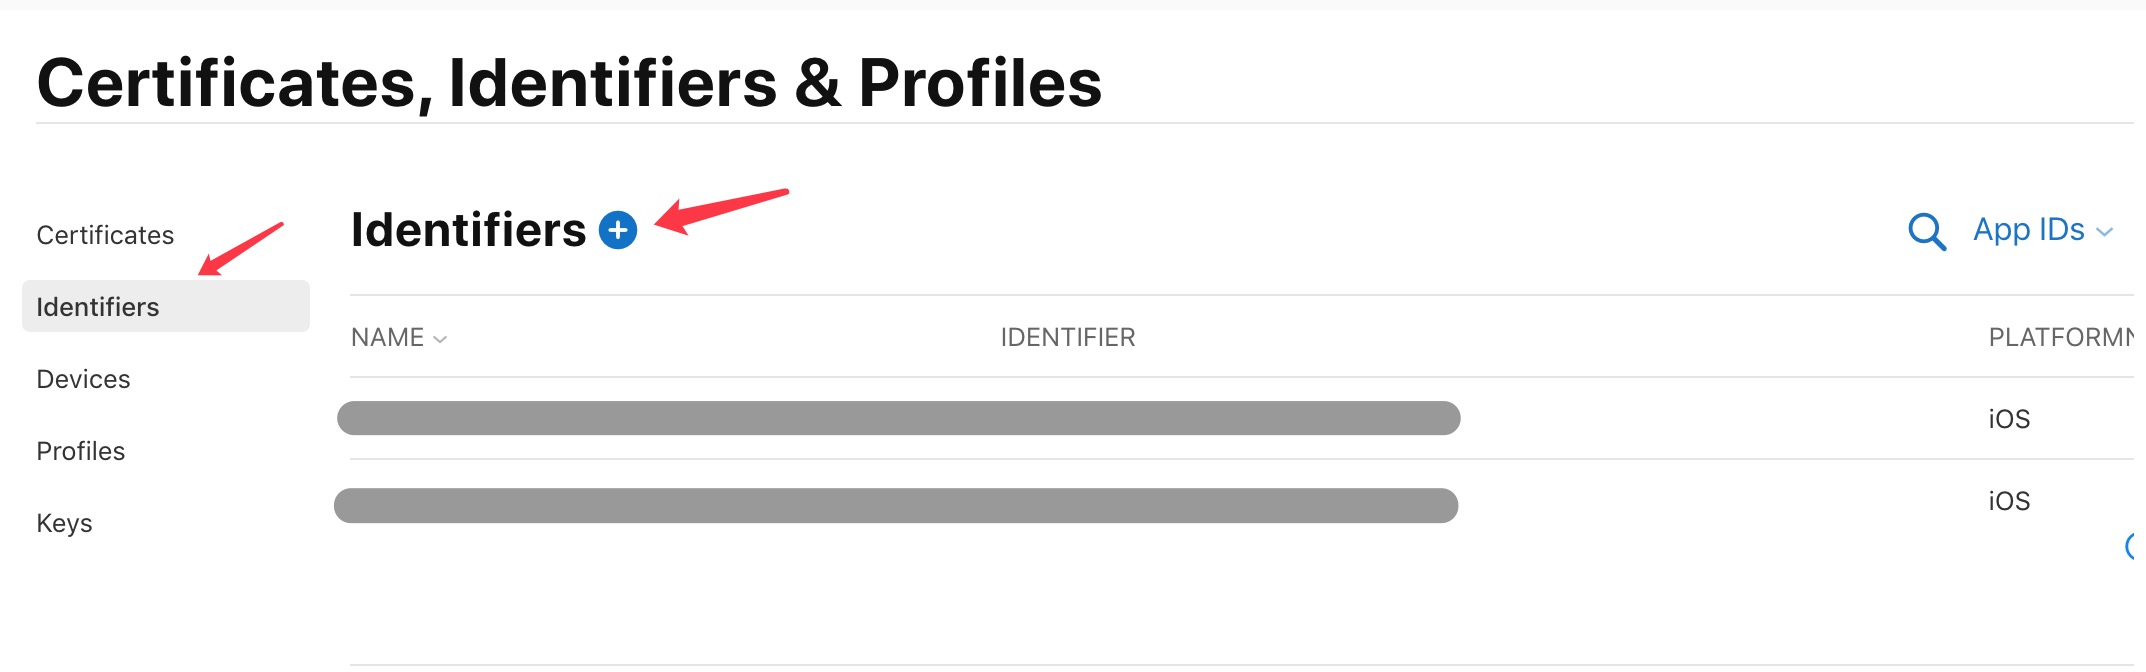
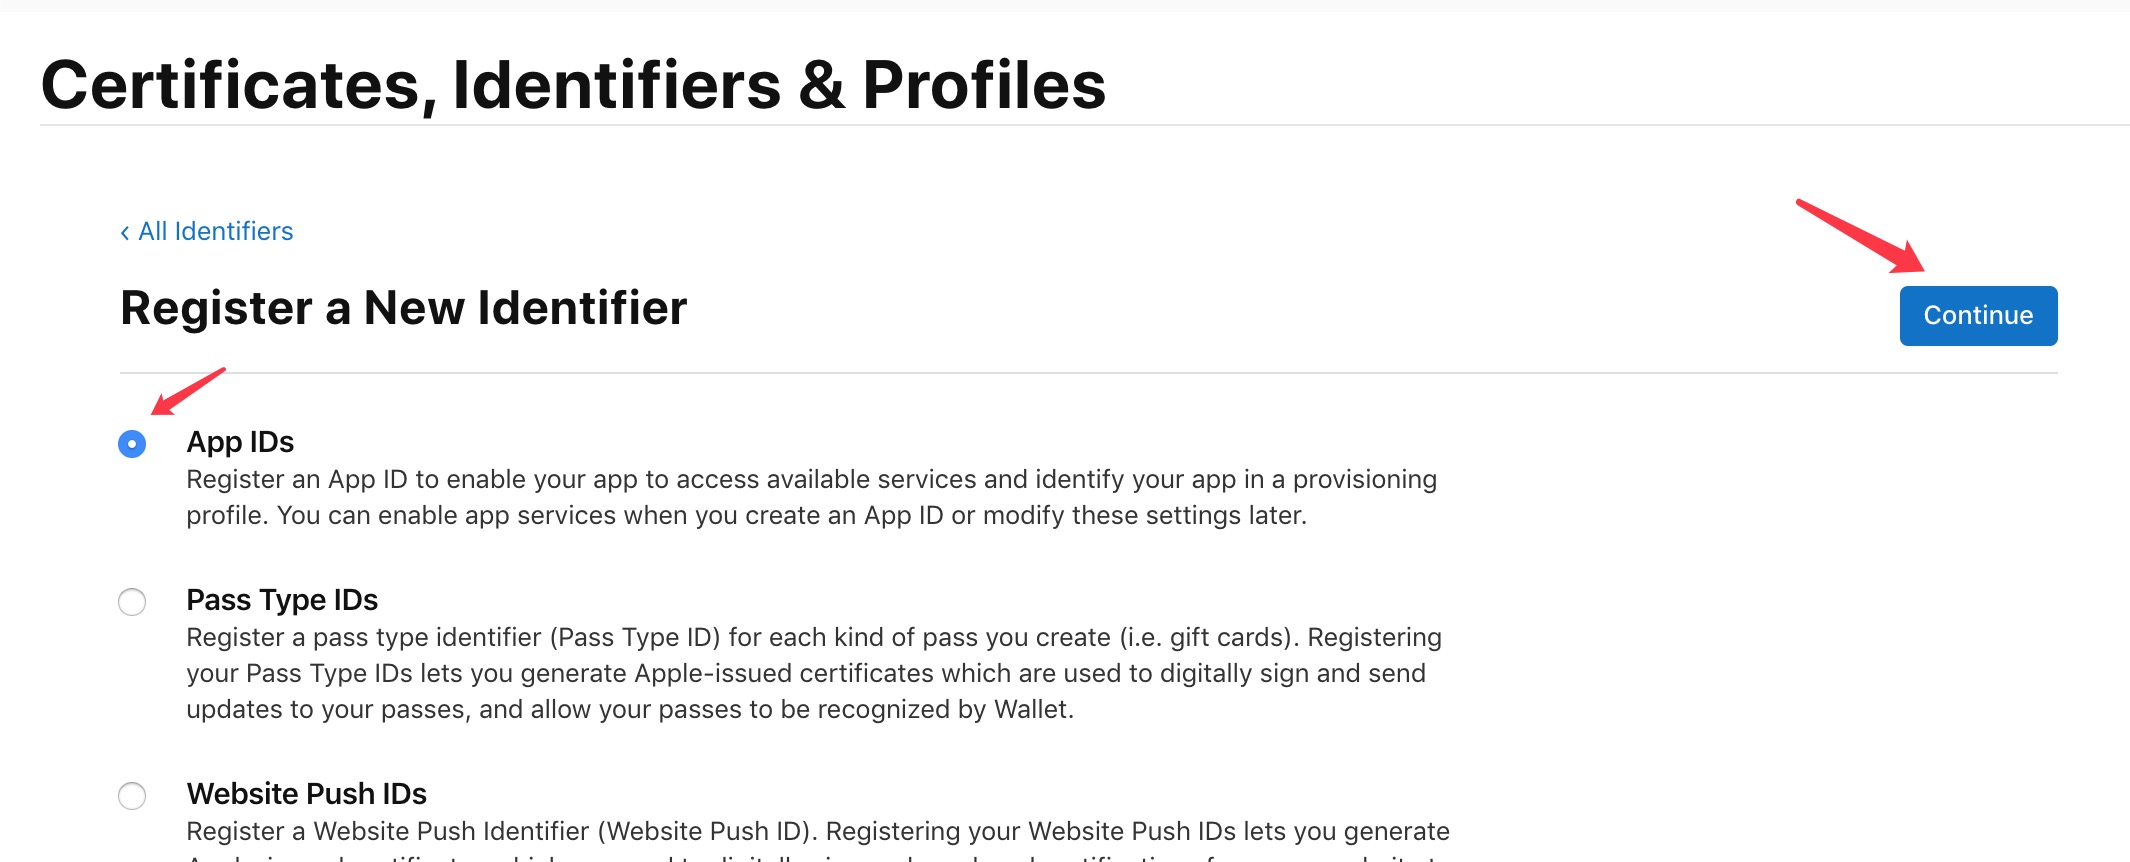
Name the App. Wildcards cannot be used for the bundle id here, otherwise the push will not be received.
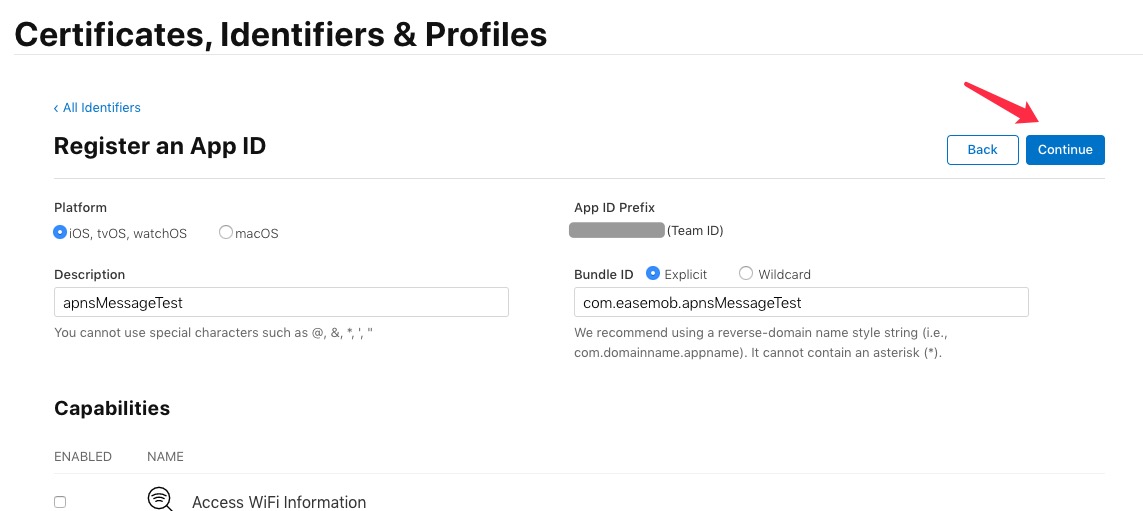
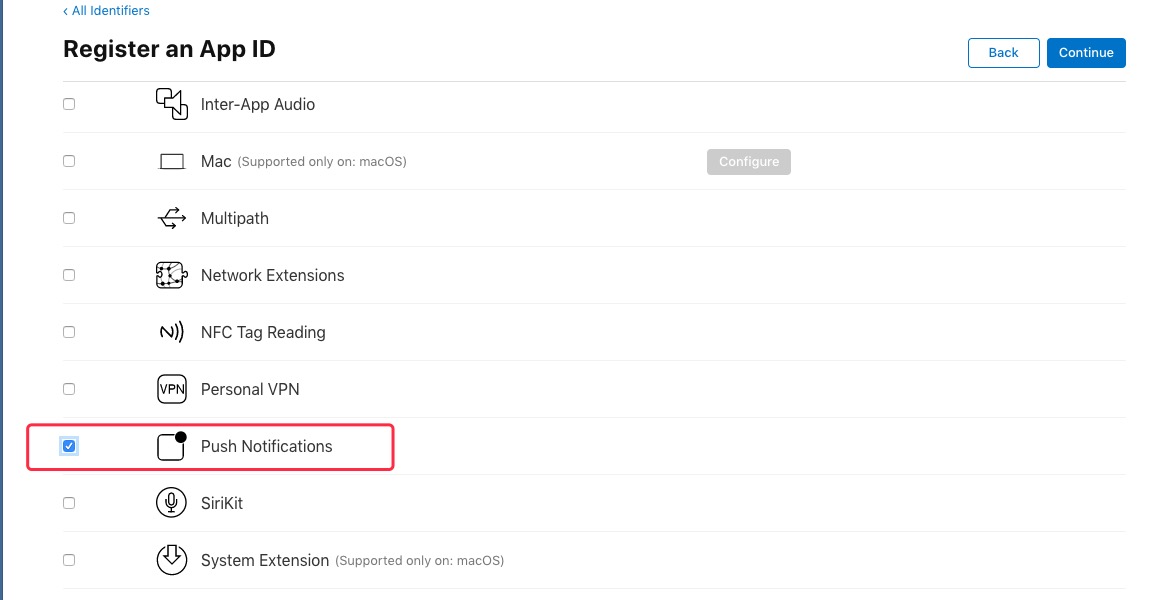
enable push function
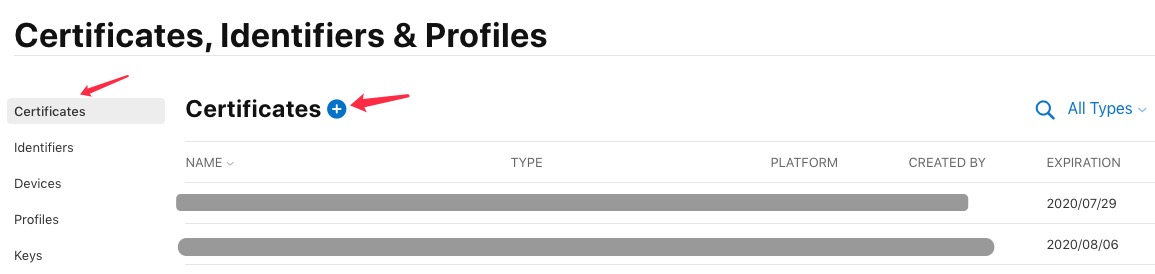
Create push certificate
If you are in a test development environment, select Apple Push Notification service SSL (Sandbox) under Services. If it is in a production environment, you need to select Apple Push Notification service SSL(Sandbox & Production) under Services.
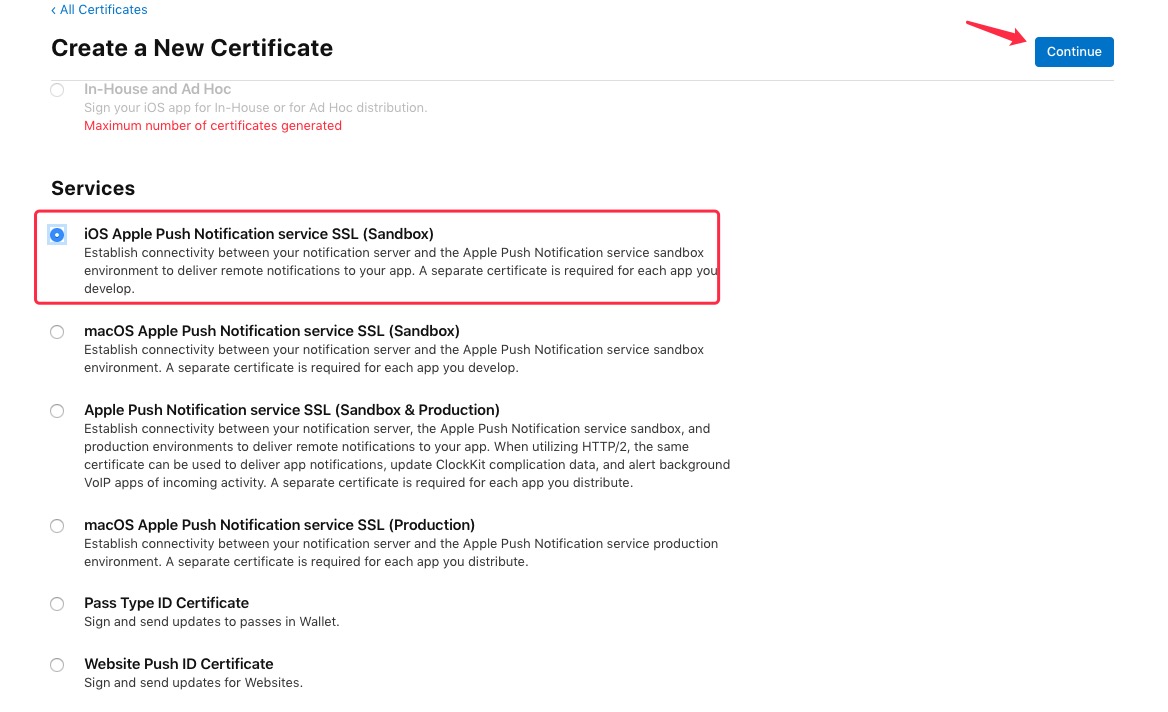
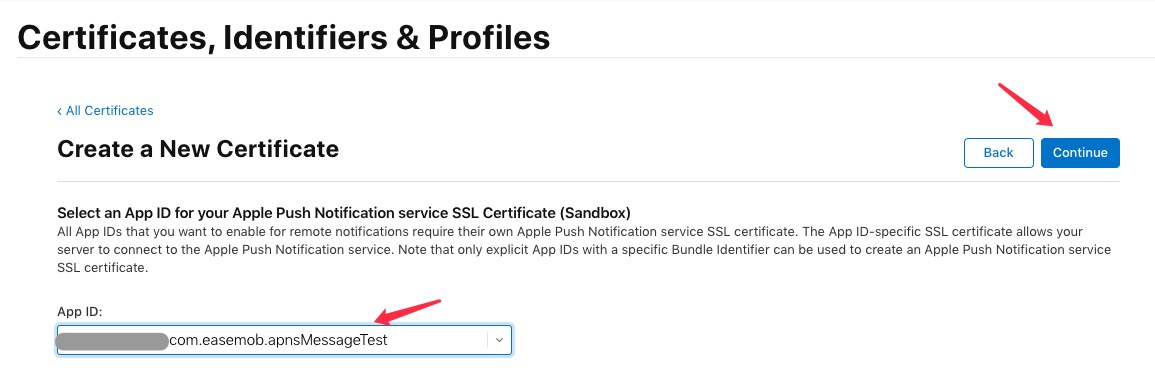
Select the App which the certificate belongs to
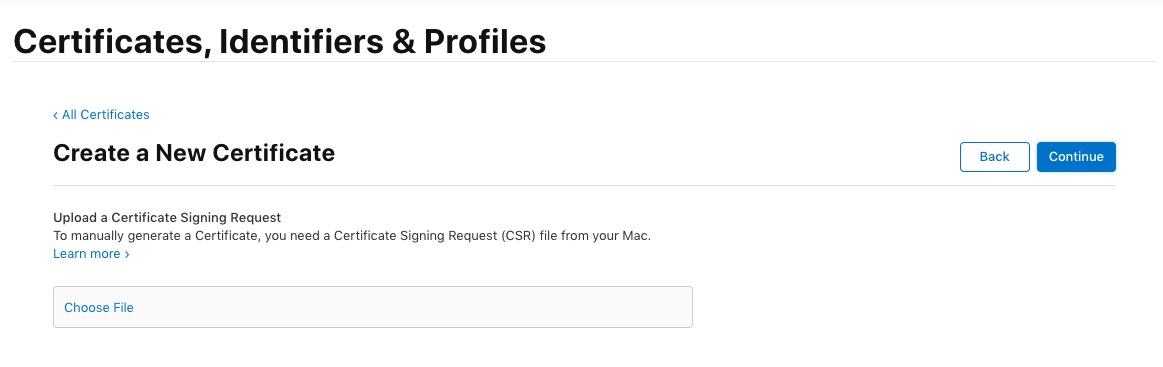
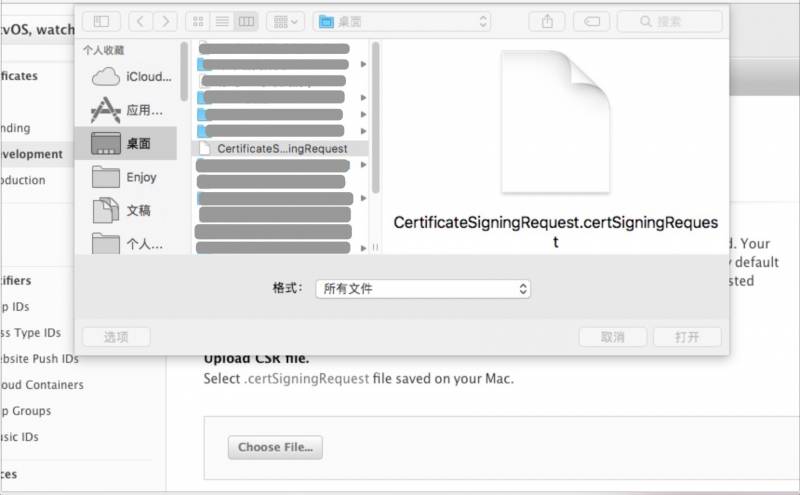
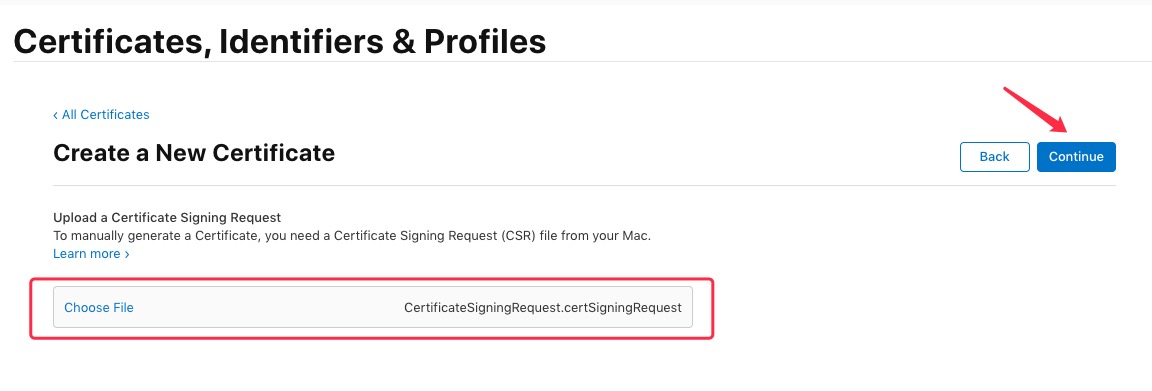
Upload CSR file
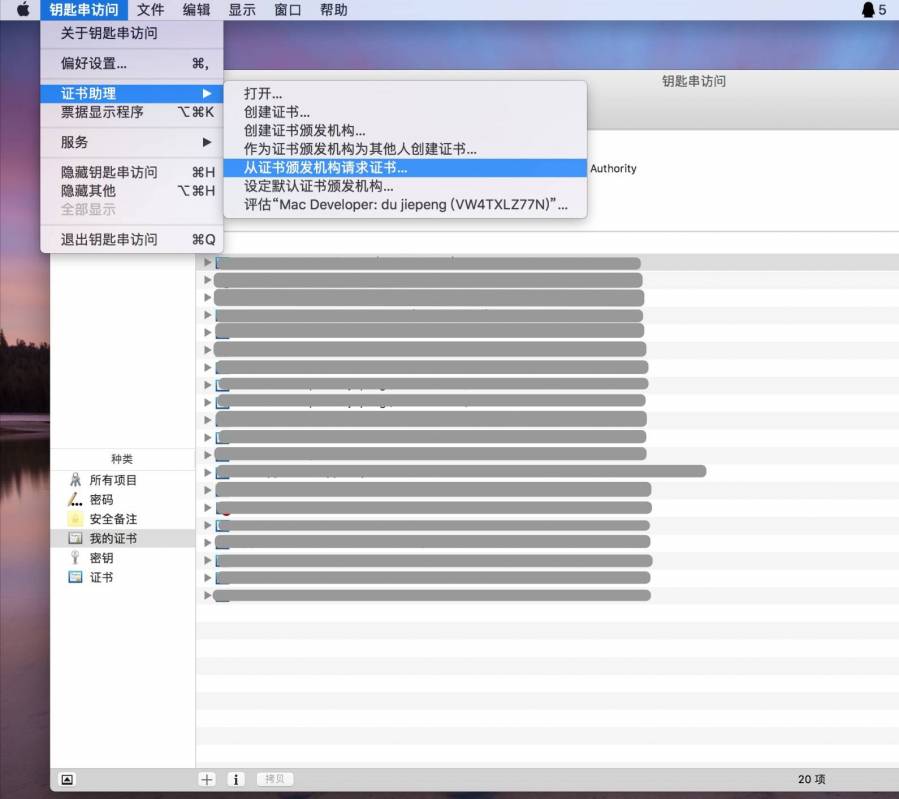
Next, let’s create a CSR file. First, select "Keychain Access"
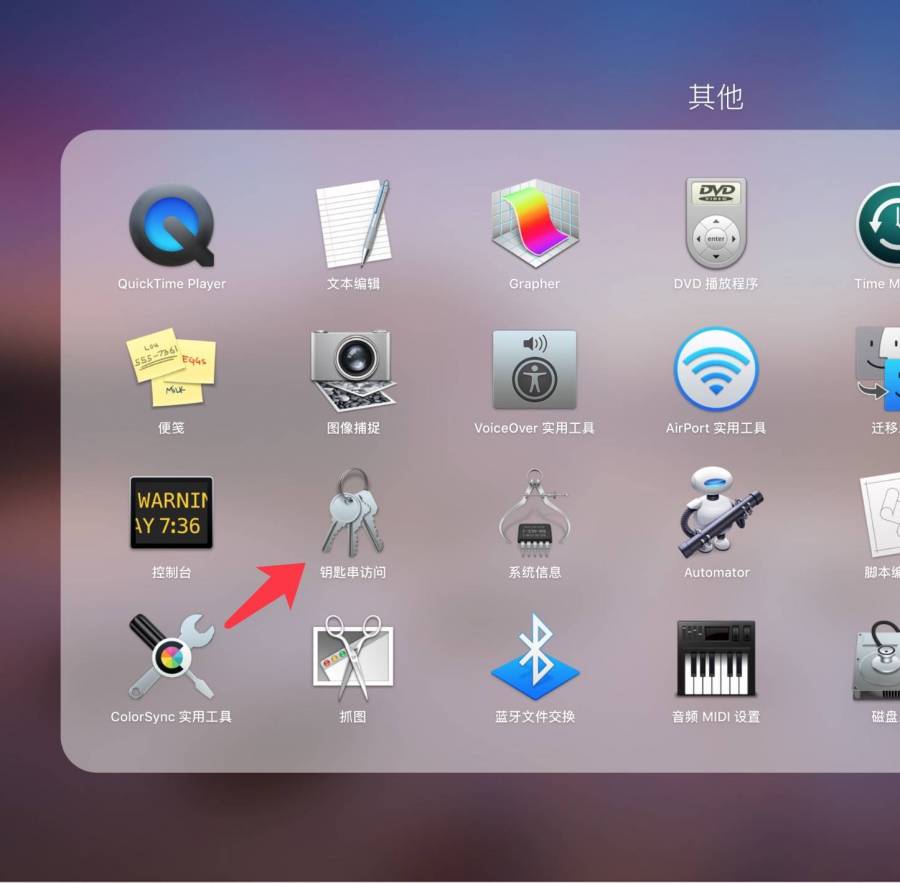
Keychain Access -- Certificate Assistant -- Request a certificate from a certificate authority
 {width=”800”}
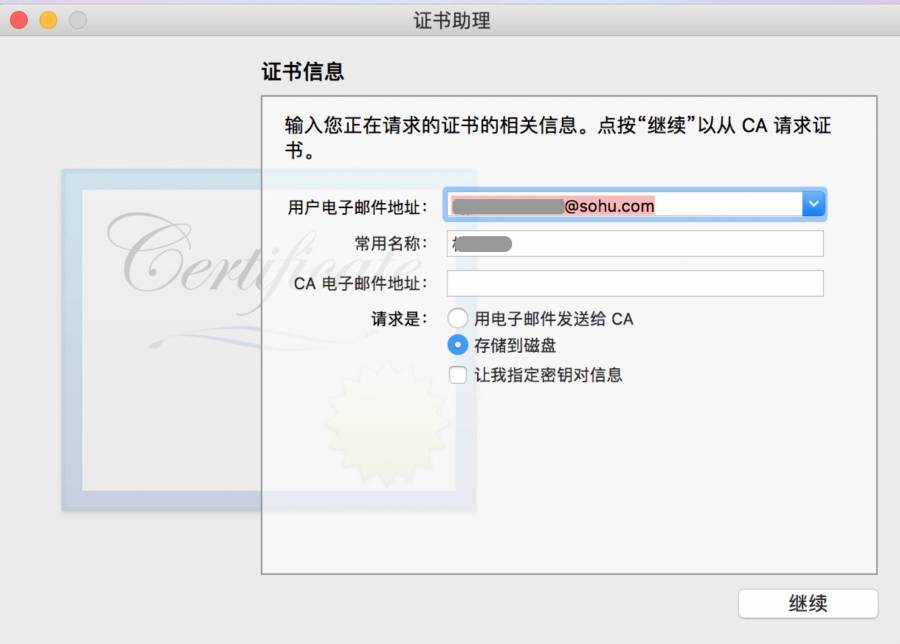
There is no requirement for e-mail, just make sure is in a normal e-mail format, and there is no restriction on name. Please pay attention to change the parameter of “request is” to “store to disk”. After that, you will get a CSR file afterwards.
 {width=”800”}
Return to the “Upload CRS File” page and upload the CSR file just generated.
 {width=”800”}
Click on Continue and there will be a download page.
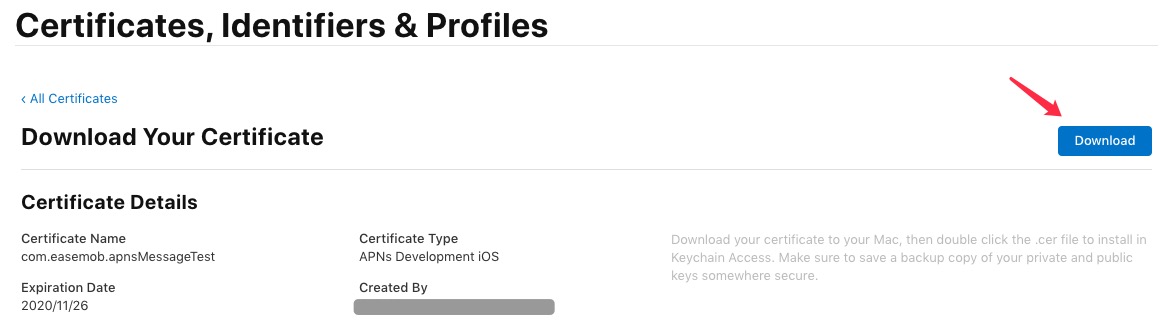
Click download, and an aps_development.cer will be downloaded. (aps.cer for production environment)
 {width=”800”}
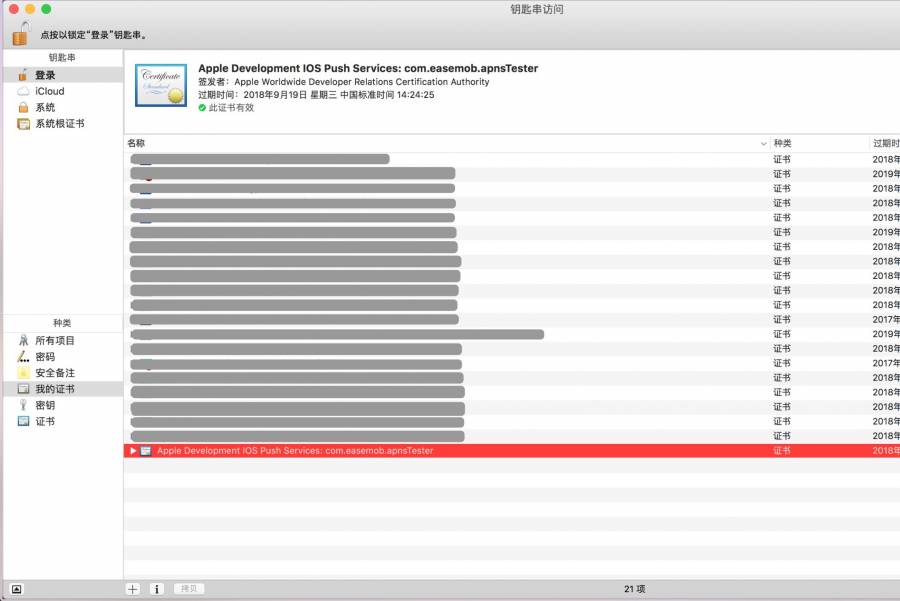
Double-click the cer file just downloaded and it will be added to “Keychain Access”. Check the certificate, you will see a bundle id certificate, this is what’s newly added.
 {width=”800”}
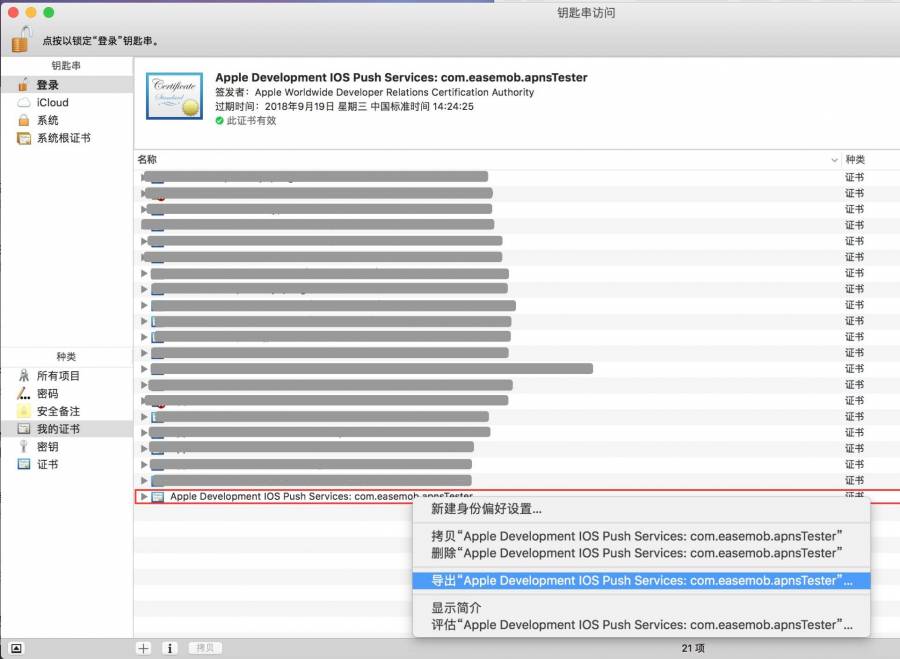
Right-click to export, and be careful not to expand when you right-click, please just right-click on the certificate
 {width=”800”}
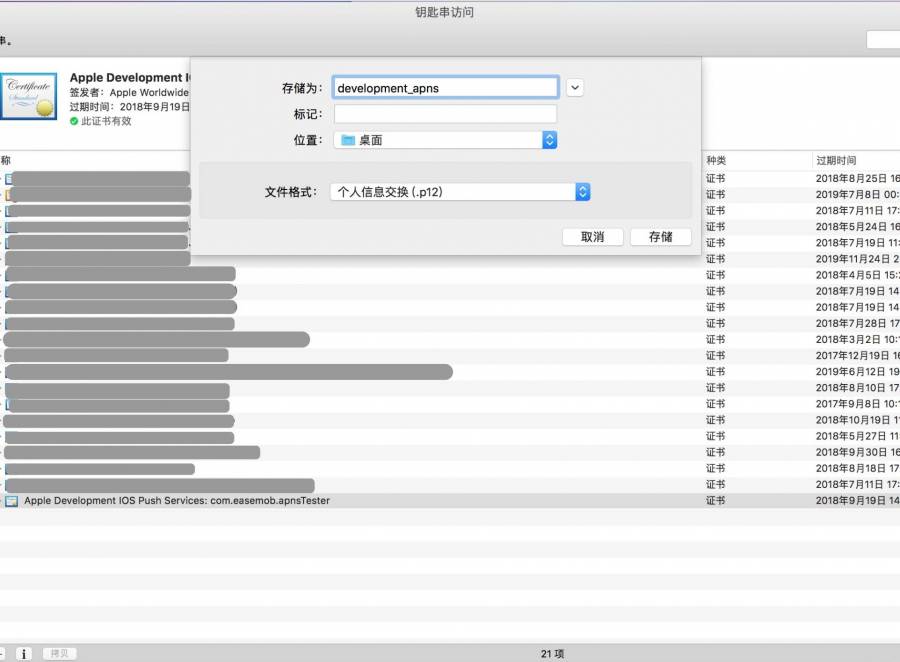
Save
 {width=”800”}
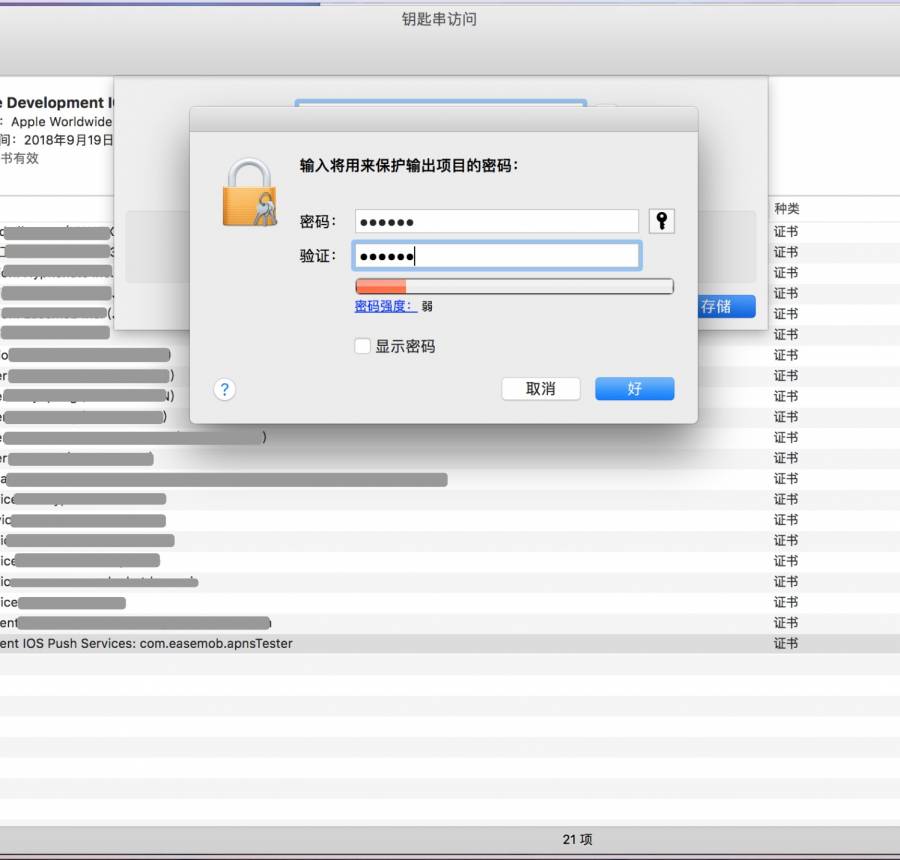
Please remember the password here, and it will be used later.
Note: When exporting a p12 certificate, the password length of the certificate should not be set to exceed 20 characters. It is recommended to use a combination of pure English or numbers. Special characters are not recommended.
 {width=”800”}
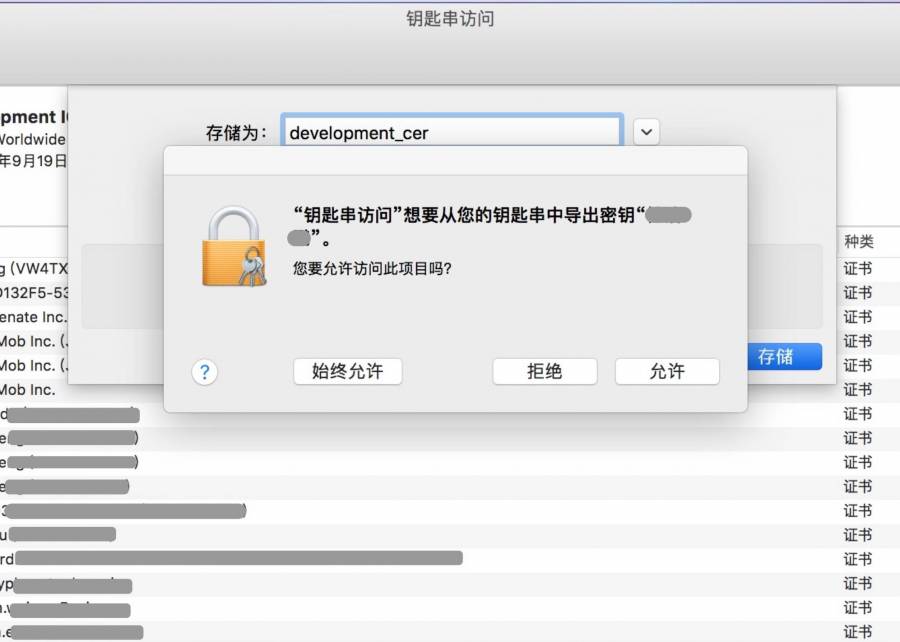
Allow keychain to access this item
 {width=”800”}
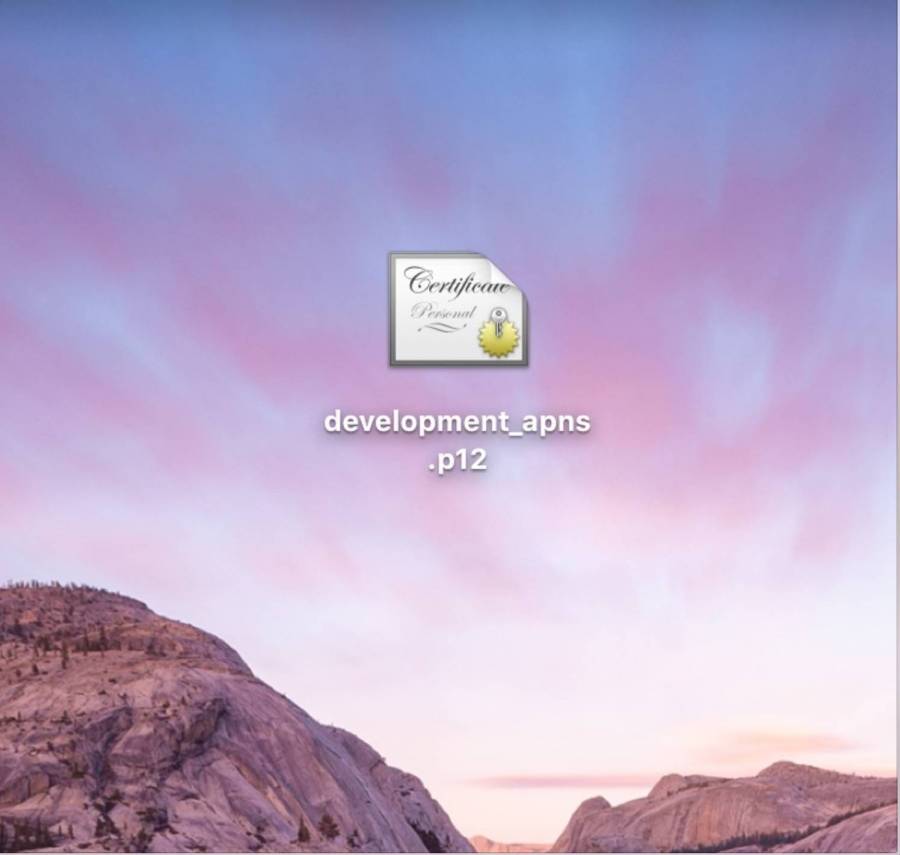
Save, and you will get a file with a suffix of p12
 {width=”800”}
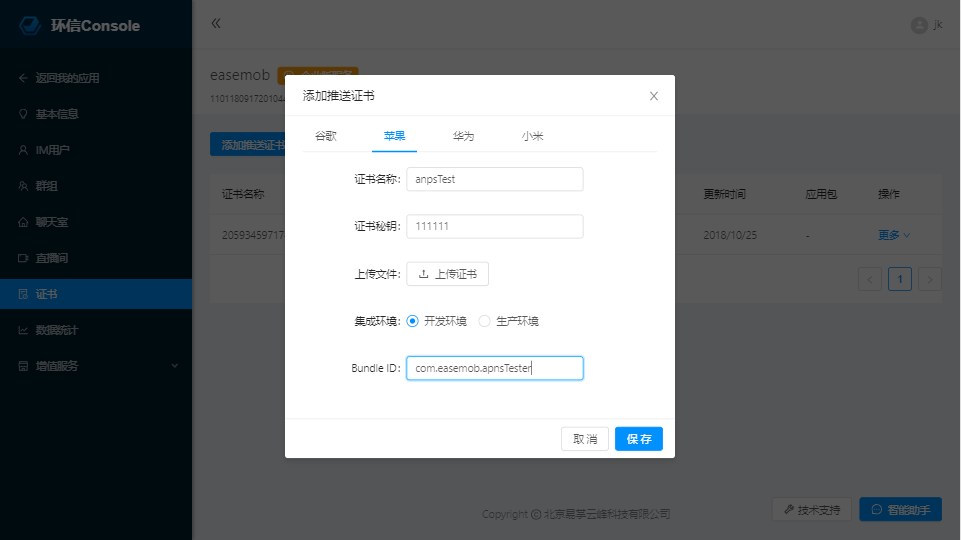
Upload the push certificate to developer console
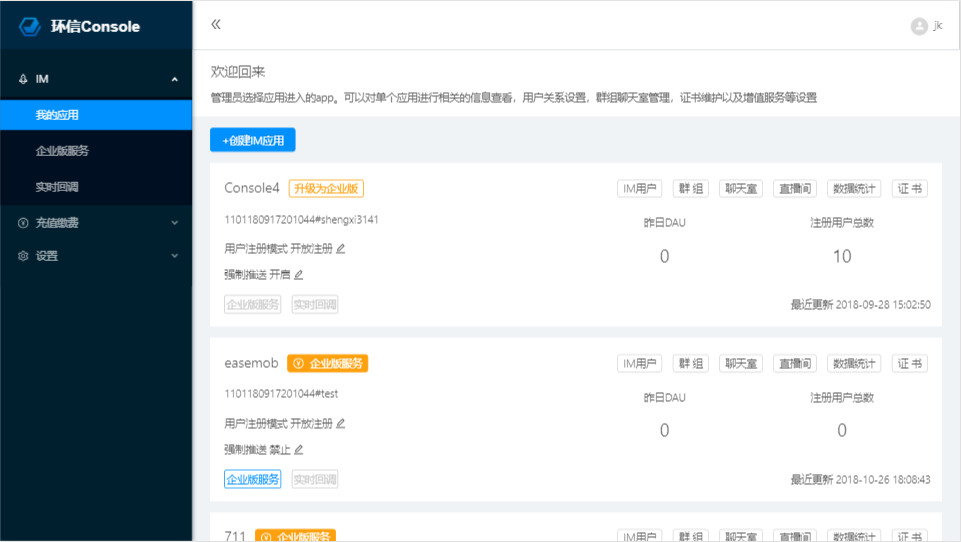
Log in to the developer console management background, find the Appkey of certificate which you want to upload, and click to enter and see more details.
Select “Certificate”
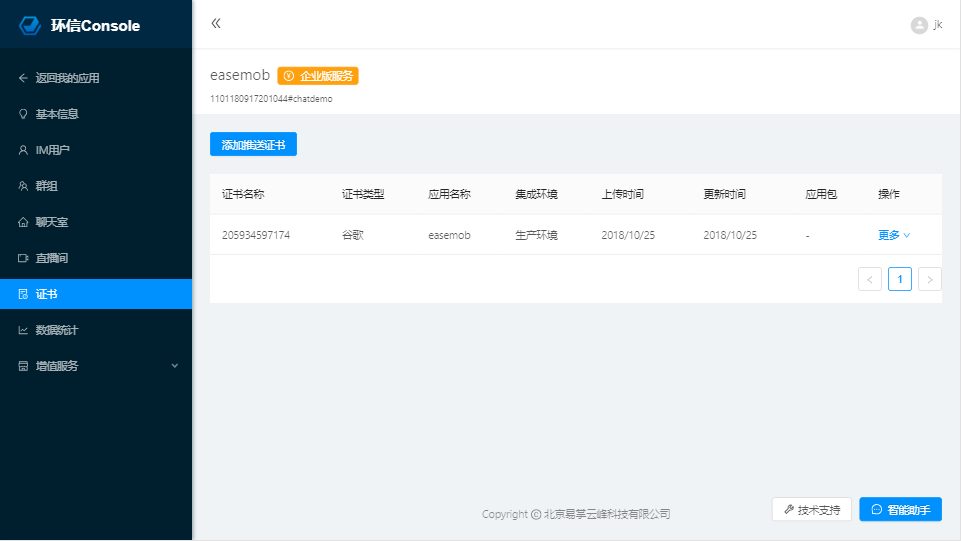
Choose “Apple”

Give the certificate a name, and remember the name, it will be useful later. Select Upload Certificate. Upload the P12 file generated in the previous step, and set the password set during export. Select the certificate type, here is [Development Environment] (if you used production before, you should select production here). Fill in the package name, which should be bundle id. Click Upload to complete the uploading certificate operation.
Note: The length of the certificate name and password should not exceed 20 characters. It is recommended to use a combination of pure English or numbers. Special characters are not recommended.
How does the client apply for DeviceToken
1、 notification for remote Registration
if ([application respondsToSelector:@selector(registerUserNotificationSettings:)]) {
    //Register push, for iOS8 and above
    UIUserNotificationSettings *settings = [UIUserNotificationSettings settingsForTypes:(UIUserNotificationTypeBadge | UIUserNotificationTypeSound | UIUserNotificationTypeAlert) categories:nil];
    [application registerUserNotificationSettings:settings];
} else {
    //Register push, for iOS8 and below
    UIRemoteNotificationType myTypes = UIRemoteNotificationTypeBadge | UIRemoteNotificationTypeAlert | UIRemoteNotificationTypeSound;
    [application registerForRemoteNotificationTypes:myTypes];
}

- (void)application:(UIApplication *)application didRegisterUserNotificationSettings:(UIUserNotificationSettings *)notificationSettings {
    [application registerForRemoteNotifications];
}
2、 Pass the obtained deviceToken to SDK
If it is iOS13 and above, please update SDK to v3.6.4 or above
// Pass the obtained deviceToken to SDK
- (void)application:(UIApplication *)application didRegisterForRemoteNotificationsWithDeviceToken:(NSData *)deviceToken
{
    dispatch_async(dispatch_get_global_queue(DISPATCH_QUEUE_PRIORITY_DEFAULT, 0), ^{
        [[AgoraChatClient sharedClient] bindDeviceToken:deviceToken];
    });
}
**Note: It must be a real OS, the simulator does not support APNs. APNs registration failure is usually caused by the use of a general certificate or simulator debugging mode. Please check the certificate and debug with a real OS. Here is the error reported by the iOS system. If you are not sure with it, please search for relevant information on the Internet. **
How to configure the push certificate on the client
When the SDK is initialized, set the push certificate which you going to be used.
// set Appkey
AgoraOptions *options = [AgoraOptions optionsWithAppkey:@"your applyed key"];
// Set the name of the push certificate
options.apnsCertName = @"apnsTest";
// Initialize SDK
[[AgoraChatClient sharedClient] initializeSDKWithOptions:options];
Common problem
How to implement local notification
When the persistent connection still exists, Local notification receive the message through the callback of the AgoraChat receiving message, and then judge the current App status, if it is in the background, you can use the code to actively pop up a notification to notify the user. The specific reference is as follows:
    - (void)messagesDidReceive:(NSArray *)aMessages {
        for (AgoraMessage *msg in aMessages) {
            UIApplicationState state = [[UIApplication sharedApplication] applicationState];
            // App in the background
            if (state == UIApplicationStateBackground) {
                    //Send local push
                 if (NSClassFromString(@"UNUserNotificationCenter")) { // ios 10
                // Set the trigger time
                UNTimeIntervalNotificationTrigger *trigger = [UNTimeIntervalNotificationTrigger triggerWithTimeInterval:0.01 repeats:NO];
                UNMutableNotificationContent *content = [[UNMutableNotificationContent alloc] init];
                content.sound = [UNNotificationSound defaultSound];
                // notification can be popped up as needed, such as displaying the details of the message, or displaying "You have a new message"
                content.body = @"content of notification";
                UNNotificationRequest *request = [UNNotificationRequest requestWithIdentifier:msg.messageId content:content trigger:trigger];
                [[UNUserNotificationCenter currentNotificationCenter] addNotificationRequest:request withCompletionHandler:nil];
            }else {
                UILocalNotification *notification = [[UILocalNotification alloc] init];
                notification.fireDate = [NSDate date]; //The time the notification was triggered
                notification.alertBody = @"content of notification";
                notification.alertAction = @"Open";
                notification.timeZone = [NSTimeZone defaultTimeZone];
                notification.soundName = UILocalNotificationDefaultSoundName;
                [[UIApplication sharedApplication] scheduleLocalNotification:notification];
            }
        }
    }
}
Parse of push content
In the AgoraChat, APNs are only generated when the persistent connection does not exist (the App process does not exist or is suspended). At this time, iOS will not be allowed direct access to the APNs content, but when the user clicks on the push notification bar, it can be found in launchOptions from
- (BOOL)application:(UIApplication *)application didFinishLaunchingWithOptions:(NSDictionary *)launchOptions;
The specific structure is as follows:
{
    "aps":{
        "alert":{
            "body":"you got a new message" // content of message
        },
        "badge":1,  // number of corner marks
        "sound":"default"   // alert sound
     },
    "f":"6001", // sender
    "t":"6006", // recevier
    "m":"373360335316321408", // message id
    "g":"1421300621769"  // group id (There is no such field, if it is a single chat)
 }
For more usage, please refer to(APNs parse)
How to renew the certificate
After the certificate expires, if you want to renew the push certificate, you need to delete the old one in the developer console, and then upload it again. The name of the upload should be the same as the name of the old certificate.
Can multiple sets of push certificates be delivered under one Appkey
Multiple certificates can be transferred under one appkey, which can implement app chat. When initializing SDK in different apps, specify different push certificates, and each certificate corresponds to the bundle id of the current app. In this way, users are logging in to different apps. It will be bound to different push certificates to implement the chat and push of the app.